By Lizzie Rubin
SAN DIEGO — There’s nothing like an audience and an impending deadline to put your goals into motion.
In 2017, I decided that, despite never having baked or cooked anything in my life, I wanted to learn to make challah. I told everyone I had wanted to make challah to connect to my culture and roots. But really, it was because I was fed up being too late to grab the last challah at my local Trader Joe’s that I said, “F*** it, I’ll do it myself.” After ruminating over the idea for months, I (finally) made a Facebook event, and invited a few dozen of my female friends, while my husband scrolled on Pinterest for recipe inspirations.
The event was a huge success, and what culminated was a monthly tradition of Rosh Chodesh (first of the Hebrew month) challah bakes. On Wednesday night, I would make around three large batches of challah dough, and on Thursday evening, 15-20 friends would show up to braid dough, nosh a little, schmooze a lot, and bake their challahs before leaving with a beautifully golden loaf in their arms.
Like most good things, COVID-19 halted our monthly Rosh Chodesh get-togethers, except for a few virtual baking sessions. The births of my first and second daughters have also made me a little busier than before. But, when the timing is right, I’m confident our monthly challah bakes will resume.
Recipe
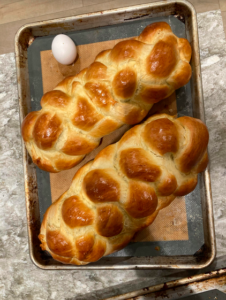
Yield
2 large loaves
Ingredients
5 tsp activated yeast
1.75 cups water
1 cup sugar
0.5 cup olive oil
6 eggs (5 for the dough; 1 for egg wash)
Dash of salt
8-9 cups bread flour
Instructions
On Thursday night or Friday morning:
- Add warm water and yeast together, and wait for yeast to bloom (about 5 minutes).
- Add sugar, salt, olive oil. Mix.
- Add 5 beaten eggs. Mix.
- Add flour, 1 cup at a time. Allow flour to mix fully before adding in the next cup. The amount of flour can vary; the most important part is how the dough feels. The dough should be dry enough so that it doesn’t stick to your hands.
- Allow to rise for 2-3 hours.
- (You can skip this step if you start your dough on Friday morning.) Punch the dough down, cover with Saran wrap, and place in the refrigerator overnight.
On Friday morning:
- Remove dough from refrigerator. Allow for dough to warm up to room temperature.
- Braid the dough.
- Allow to rise again for 45-60 minutes.
- Turn on oven to 350F.
- Egg wash your challah, and place in oven.
- Bake until your loaves are golden brown (about 35-45 minutes), rotating every 15 minutes for an even color.

Lizzie Rubin lives in Pacific Beach with her husband and two children.
I love this article! Thanks for sharing your awesome challah recipe lizzie! I will definitely try it out to see how it goes. Do you use a baking mat? I always wondered how they make the challah bottom soft at the store. Mine always comes out a little bit harder and browner than I want.
Yup, I use silicone baking mats! Amazon Basics Silicone, Non-Stick, Food Safe Baking Mat – Pack of 2 https://www.amazon.com/dp/B0725GYNG6/ref=cm_sw_r_cp_api_glt_fabc_6FDS4C10WA0Z63GJ4YZS